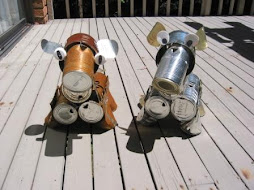
and the result was the above... my very own homemade photo knob...
 so far i've only made several... not enough to refurb the entire house...
lovely!

the real life version is not as blurry...

to make my own knobs, the first thing to do was to visit "barnes" in newtown (http://www.barnes.com.au/) to get all the gear... 80 bucks later... i got my very own silicone mould material... and other things...
 the shop did have some "door knob moulds" but they weren't in the correct dimensions, so i had to make my own mould (which turned out to be $35 instead of $10 for the ready mould)...
it was best to pour the mould in a container (a cut recycle water bottle was ideal), as it took several hours for the silicone to set... i found top of my j'dore perfume to be the perfectly sized roundness i was looking for...
 also brought back from the shop was the clear polyester casting resin and the setting agent MEPK... pipette and measuring cup were essential...
 all things are set and ready to go... i also got some nuts and bolts from bunbuns (but why did i need them? on that later..) and photos to put into the knobs...
first i rubbed some mould release on the silicone surface, so that the set resin would be easy to take out...

then, i tried the trimmed photo to make sure it fitted, remembering that the "bolt" would be sitting into the knob 8-10mm from the surface...

 now back to the nuts and bolts from bunbuns...
i first went to bunbuns to find knob bases (so that the home made knob could be screwed into the cupboard)... but these were like gold dust and were not to be found in a shop (only online)... so i had to "make my own" knob bases with simple nuts and bolts... the nut had to sit in the set resin while the bolt/ screw had to extend into the resin but also be freely screwed in and unscrewed...
i estimated the variable length required and taped it with sticky tape, so the screw won't be stuck in the set resin...
the sticky tape end would sit into the resin...
 there was also the homemade toothpick device to secure the nut and bolt while the resin was setting (it would take about 6 hours)...
 i secured everything together with more sticky tape...
 and rested the toothpicks on blutac to get the level and the height correct...
 it also needed to be dead centre... otherwise it would be wonky when it finally calls the cupboard home...
when everything was alighned and ready to go...
 it was the time for some resin pouring...
 20-25mL of resin was enough for one knob... 0.7-2% of MKEP was needed to set the resin (= less than 0.4mL)... i found that mixing up such small volume to be quite difficult... but lucky the setting of the resin didn't depend on a precise ratio...
a little was poured into the mould first...

then the photo was coated with abit of resin to discourage bubbles...

the photo was put in place and resin was poured to the top just covering the nut but not the screw with no sticky tape...

... a wait of 6+ hours... the resin became gel like... then shrinked from the edge (could see slight separation from mould)...

it was then pulled out of the mould...

... the surface was still "wet" (sticky - resin actaully would take a couple of days to set hard, so don't touch it all over, cos it would become matt with one's fingerprints)...

to loosen the screw, i clamped it tight and screwed it out...

there you go, the finished knob... notice how far the screw extends into the resin - that's why the photo is pushed to the near surface of the knob...
after air drying for a couple of days, it could be sanded back to its shiny luster and be rehomed as the new kitchen cupboard knob...
and in true bargain hunter spirit, it is time to analyse - was this exercise a bargain?
this did turn out to be a bargain... was i to purchase 17 brand new love knobs, it would cost me $170... now i have my own customised, unique knobs (for the whole house not just the kitchen) for $80... and lots of fun making them too...


 and let it rose again...


.jpg)