Monday 23 August 2010

DIY folding bassinet

bubs will be here soon. we originally thought it would be a good idea for her to sleep in her own room, but after re-evaluating the impending 2/3 hourly feed situation, we had to rethink - probably it would be wiser to have her next to our bed...
we did buy one of these:

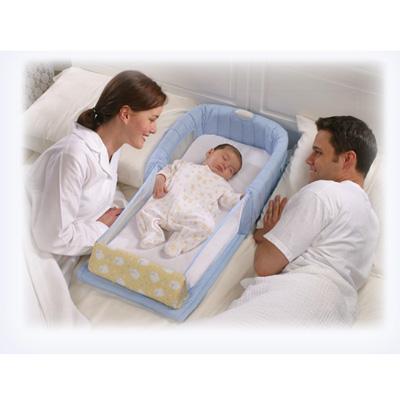
originally to put in a cot, so bubs could be snug and centred and not roll around the cot...
we never thought we would acutally use it as a co-sleeper - as my heavily snoring self might squash bubs unintentionally
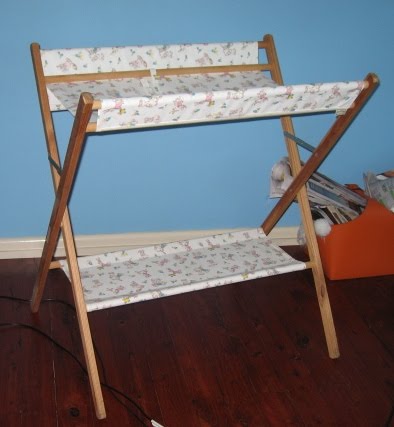
then we got lots of useful stuff from Belle and family... including a folding change table... Thanks Belle!

"What if i could refashion it into a bassinet (like the boori one (just like the one below) in the shops) plus a change table, and it would be foldable (for easy manouvering and storage) too! We would be able to have bubs in our room, in the lounge room, anywhere in the house, no problems!"


trying out the co-sleeper on the folding change table...

so i firstly had to remove the old fabric...

then i had to cut out the new fabric...
yep... good value ikea...


so here's the result... (after refashioning the folding change table into bubs' easy clean easy fold bassinet/change table)
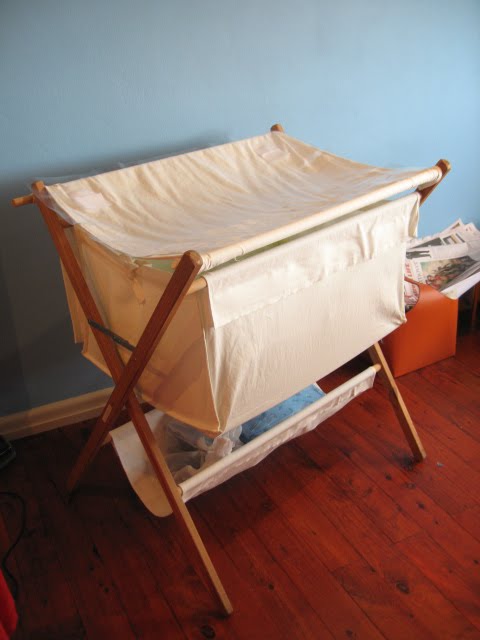
it started off with just the bassinet (cloth box)... then i added the side pockets for storage... bottom rack for even more storage and then the "change table cloth"...
here... pooh is pretending to be bubs... sleeping... the co-sleeper fits snugly...
if we didn't have the co-sleeper, we could then get a piece of foam cut out at clark rubber or something...
and the "change table cloth" with detachable clear vinyl top layer for easy cleaning...
in fact all new cloth components - bassinet, change table, side pockets, bottom rack etc can all be detached for a clean in the washing machine - cos everything is secured with velcro / extra wide heavy duty velcro...
side pockets to put all the creams, wipes etc etc... and the bottom rack to put extra clean nappies
a nappy changing pooh...
pooh back to sleep...

best of all... it can be folded away and stored... folded and transported... and after its life as a bassinet... it'll still be useful as a change table / storage for bubs...

Thursday 19 August 2010

nostalgic food


mcduck loves junket and so do i...

crafty bits in life

i was about to bin this support cushion (mum used for driving years ago)... then i thought, i might be able to rescue it and give it another life...

didn't have a pattern...
just draped over the cushion with my salvation army fabric remnant...

also added my blue t shirt and a zip from my collection...


now everyone is happy with extra back support in front of the computer or on the couch...

Monday 12 July 2010

DIY breastfeeding cloth breast pads

i haven't been making much the last 6 months... now bubs is getting bigger and ready to come out in a couple of months, i'm back onto making my crafty bits...
for the last months, i have accummulated diff types of fabric to make "bubs'stuff"... one of the "stuff" i will really need would be reusable breast pads to soak up any leakages...
material used: flannelette cotton (off cuts from bed sheet), jersey cotton (off cuts from resizing t shirts), skin colour stretch jersey (off cuts from nude slip), PEVA polyethylene vinyl acetate (waterproof layer from shower curtain)
what to do? cut circles, cut out 40 degrees, sew cone shape, stack diff layers (from outside nude layer, then PEVA waterproof layer, then absorbant jersey / flannelette layer, to inner soft flannelette layer) & sew together in zigzag stitch--> final result = cone shaped / contoured breast pads
circle had to be about 10-12 cm in diametre... i used my packing tape as a mould, traced and cut out on fabric...

much cheaper to use PEVA as waterproof layer rather than PUL polyurethanelaminate

sew 40 degrees and then cut off. do this for each layer individually
use protractor to draw on 40 degrees first --> smaller breast, greater degrees; larger breast, smaller angle...
cut off after sewing... will become contoured cone...


stack diff layers and then sew together at the circular edge with zig zag stitch
trim excess fabric on the edges

Saturday 30 January 2010

"birthday dress" - reversible slip dress

inside my little birthday parcel (thanks to Ms Genie J) were two v pretty sheets of sheer, silky fabric... one with repeated hexagonal dots, squares, herringbone and floral motives,
the other, a glistening lining of snowwhite silk

immediately the fabric morphed into a dress in my mind - a loose fitting slip dress... but how was i to transform my "birthday (fabric) dress" into a reality with my v limited sewing skills?

objectives = 1)maximise the display of both fabric esp the sheer quality 2)include multiway elements (reversible & extra scarf/belt) 3)techically easy to make
i searched on various sites for ideas and patterns... i wore my stripy silk dress for insipration...
in the end, i decided on a patternless design...
first i cut a strip off both fabric for my scarf / belt (thinking... even if i stuffed the dress up, i would still have a pretty scarf to wear!)

making the scarf wasn't too hard technically... i only had to sew straight...
now that i had the scarf / belt / tie done, i could get on with the dress (which proved to be much more diff than i first thought)


design elements = 1)reversible dress (pattern-side and snowwhite-side being interchangable, had to remember finishing the seams on both sides) 2)changable neck opening / neckline (so it could be worn with a tight high neckline - sort of halter neck looking, or a loose draping neckline) 3)french-seaming every raw joining edge (to stop fabric from fraying)
a day later... well into the night... i finished!

pattern-side, halterneck style, wide snowwhite belt

snowwhite-side, halterneck style, wide patterned belt

snowwhite-side, loose neckline, loose fitting patterned belt

snowwhite-side, loose neckline, wide patterned belt

pattern-side, loose neckline, loose snowwhite belt

there were numerous mistakes and re-sewing, re-sewing, re-sewing...
the draping was not perfect... the stitches and finishings were pretty rough...
but i learned so much!
snowflake said the pattern-side is prettier and the snowwhite side looked "inside out"... i quite like the snowwhite-side...

well... my "birthday dress" might always look "homemade", but at least i can accessorise with my "birthday scarf/belt" which looks more professionally made!